Tips To Install an In Ground Basketball Hoop?
Steps to Install In-Ground Basketball Hoop
Installing an in-ground basketball hoop is something that you don’t want to do more than once if you can avoid it. Some people choose to hire a handy person or a builder to prepare for it.
Tips to Install an In-Ground Basketball Hoop
The first step is to call 811 or other offices responsible for the utilities in the neighborhood to check whether digging a hole is going to hit any important lines buried in the ground which will knock out essential services.
Once you’ve checked that you’re all clear from a local utility standpoint, you need to check if there’s any restriction from your housing association or other parties as to what can be installed in your front yard (or backyard for that matter).
Something that might be considered obstruction or blocking the view may contravene a rule and have to come out post-purchase and post-installation, so it’s best the verify that you’re good to go ahead.
It also never hurts to notify both your neighbors about your plans, so they know when there’ll be some work going on outside and can plan around it. They also can raise any meaningful objections at that time and not feel slighted.
Next, if you’re doing it yourself, you’ll need to pull together the tools that you’ll require.
This includes items like some nails and a hammer, a wheelbarrow, a post hole digger would certainly be essential, a shovel, some stakes, a measuring tape, a level checker to ensure the backboard is level with the ground, and enough concrete mix (with a place to mix it).
Consider the measurements that you’ll need for clearance to install the hoop and to have enough space to play too. Make sure to follow the instructions from the manufacturer clearly and fully as each model will have different information provided in many cases.
For instance, getting the right cement consistency is important otherwise it won’t be strong enough to hold the pole and heavy backboard in place.
Dig a hole deep enough for the length of the pole that will go into the ground. As different models have different pole lengths, check the instructions clearly before proceeding. The most common depth is 24 inches, but it does vary.
Once the concrete is filled inside the hole, the pole can be inserted. Bear in mind, that shortly after the pole is inserted, it will set and cannot be removed at all.
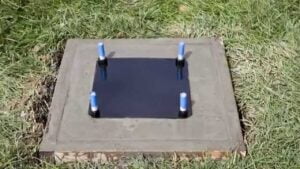
Some in-ground basketball hoops come with an anchor kit. Sometimes these setups require a 48-inch depth; it all depends on the make and model. The number of bags of cement and the pounds of ready cement to pour depends entirely on the instructions and shouldn’t be bought or prepared until this is determined correctly.
The cement can be prepared inside the wheelbarrow and then shoveled inside the hole in the ground at the appropriate time.
Cement takes 24-72 hours to set fully. Follow the instructions completely here because otherwise, you could have a backboard falling over and breaking, possibly on top of a player. If the cement requires 3 days to be 100% secure, give it the full three days with no corner-cutting.
Related Post


